How to Replace an Oven Door Gasket?

Oven Door Gasket
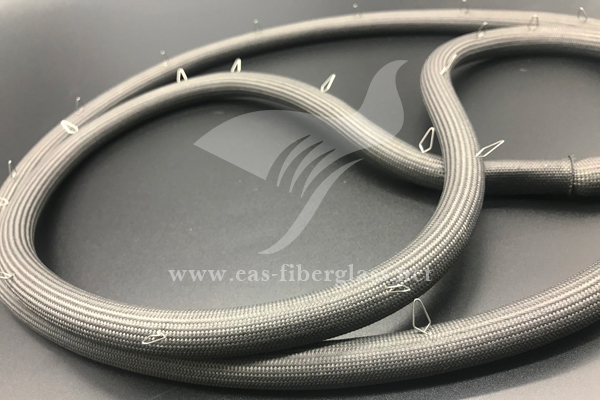
The Oven Door Gasket is designed to provide an effective seal for oven doors, maintaining internal temperatures and ensuring energy efficiency. This gasket is crafted from a fiberglass sleeve encased in a wire mesh, which is reinforced with pins for secure and durable installation. With a high-temperature resistance of up to 550℃, it is ideal for use in various oven applications where reliable sealing is essential. If heat is escaping your oven, it may be time to replace your oven door gasket. Here are some steps for a successful DIY gasket replacement!
The oven door gasket helps seal the door to keep heat inside, ensuring your oven operates efficiently. If you notice uneven cooking, difficulty reaching the correct temperature, or heat escaping from the door, it may be time to replace the gasket. A worn gasket can lead to longer cooking times and increased energy costs as the oven works harder to maintain temperature.
If your gasket is cracked or appears worn, consult your manufacturer’s instructions to find the correct replacement part. You’ll likely find a suitable gasket at home improvement stores, hardware stores, or online. Gather a few tools for the job: needle-nose pliers, cleaning materials, and possibly a screwdriver.
Step 1: Cool and Disconnect Power Before starting, ensure the oven is cool. Disconnect power by unplugging the oven, turning off the circuit breaker, or closing the gas valve for gas ovens.
Step 2: Remove the Old Gasket Open the oven door and examine the old gasket. It may be secured with pins, clips, screws, or may simply fit snugly into a channel. If secured with screws or plates, remove them first. Using pliers or a screwdriver, gently pull out the old gasket and any remaining fasteners.
Step 3: Clean the Channel With the gasket removed, clean any grease or debris from the channel. Use warm, soapy water and a soft cloth to wipe down the area. For tougher residue, use a brush to scrub the channel. Rinse and dry completely.
Step 4: Install the New Gasket Fit the new gasket by aligning it with the channel. If your gasket uses pins or clips, secure these as you go. For friction-fitted gaskets, press it firmly into place, starting at the top and working around the door. Ensure the ends are aligned and secure. Reconnect power when finished.
Step 5: Allow the Gasket to Settle Initially, the new gasket may feel stiff and make the door harder to close. It will become more flexible with use. To speed up the adjustment, lock the door overnight if your oven has a locking mechanism.
Disconnect Power for Repairs: Always disconnect power when working on appliances. For gas ovens, leave immediately if you detect a gas smell and call emergency services from a safe location.
Regular Gasket Checks: Inspect your gasket periodically, especially after a self-cleaning cycle. Clean it with warm water and mild detergent to prevent buildup.
Additional Oven Care Tips:
Maintaining your oven gasket is an easy way to help your oven function more reliably, reduce energy consumption, and improve overall cooking performance.